Echoes of Time – Unreal Engine 5
| June 15, 2023
This project focused on creating a fictitious movie trailer with interactive capabilities using Unreal Engine 5. The trailer featured several distinct and contrasting scene sequences, highlighting different animated elements and concepts.
Video
Concept design
This trailer’s plot is loosely based on the video game ‘Outer Wilds’ by Alex Beachum. Notably, it discusses space exploration, the discovery of an ancient civilisation, and the main character’s being trapped in a time loop.
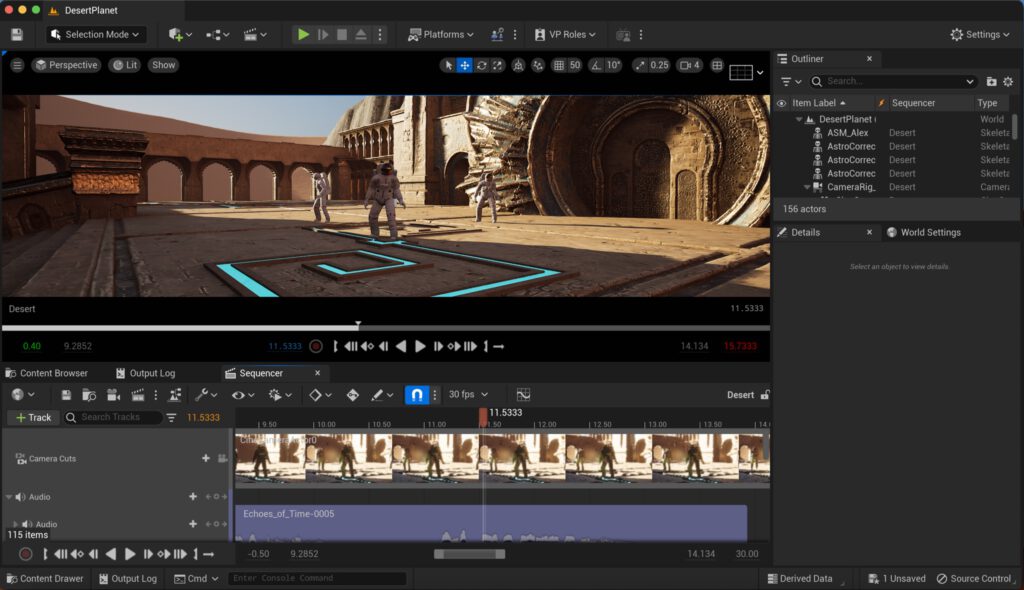
In this trailer, Alex leads a space mission with two colleagues. Together, they are exploring a new galaxy, with their base stationed on a small natural satellite of a gaseous giant. During one of their expeditions, the team stumbles upon signs of a long-lost civilisation on a desert planet. As they investigate, mysterious drawings on the ground begin to glow.
However, Alex was stuck in a loop, with only her memories intact. Trapped in a time loop, Alex becomes determined to uncover the truth behind the drawings and the lost civilisation, leading her to the centre of the universe.
Assets
The 3D assets used are royalty-free and are for free use with attribution (usually CC licenses ). Most assets are from Sketchfab and CGtrader. Other assets like terrain maps, 3D models or textures have been downloaded from the NASA 3D repository. Several objects and materials have been downloaded from the free assets of Unreal Engine and Quixel Bridge. Finally, other assets, like Alex’s bedroom, Alex’s Clock, or the emissive lights in the ruins, have been created specifically for the trailer using Blender, Shapr3D and Adobe Illustrator.
Features used
Motion State Machines
An Animation Blueprint incorporating a Motion State Machine has been used to manage and seamlessly blend the main character’s animations in the desert temple scene. The blueprint comprises a State Machine encompassing four states: Idle, Looking, Around, and Looking there. Each state corresponds to a distinct animation. I configured appropriate blending settings for each edge to ensure a smooth transition between states.
The Enum variable controlling the state of the animation has been exposed to the sequencer and is controlled by changing its value in different keyframes.
Blending and transplanting
Unreal provides various techniques for motion editing. While developing this project, I experimented with multiple methods, including animation editing, by adjusting the keyframes of imported animations. However, animation blending and transplanting are the two most noteworthy methods I used to edit motion.
I used two techniques in my trailer regarding animation blending: sequencer blending and motion state machines. Sequencer blending is a user-friendly and powerful tool that seamlessly blends two animations. It also offers flexible options to modify blending curves and overlapping levels naturally. However, motion state machines provide greater control for more intricate sequences and conditional animations and would be a better option.
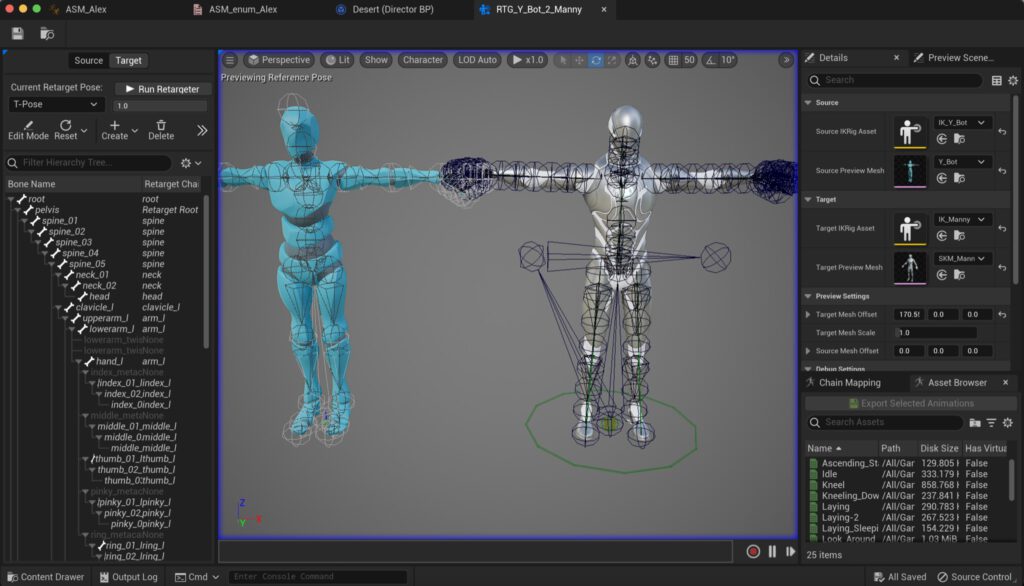
In addition, for animation transplanting, I employed two technologies: Unreal’s retargeted and IK solvers. I had imported numerous animations from different sources that used other skeletons, and combining these technologies allowed me to use the animations interchangeably and effortlessly. First, I created an IK solver for each skeleton in use and then a retargeting to transform the animations from the source to the desired skeleton.
Keyframed animation
Most of the characters in the trailer have at least some component keyframes. This means that at least some transformations or other aspects were animated by defining individual keyframes in the sequencer. However, one element that stood out in the trailer was the spaceship, a complex actor entirely keyframe-animated in two scenes. Also, the cinematic cameras have been keyframed and animated in all scenes except when rails have been used, which occurs in 3 takes, or when the camera has been attached to an actor, which happens in the scene where the camera follows the spaceship.
The spaceship’s thrusters, body, and legs were animated within the object’s hierarchy and globally keyframed in the scenes where it appeared. The spaceship’s animation results are very satisfactory, showcasing the benefits of keyframe animation. Although keyframing the animations is time-consuming, it pays off in these cases, as it allows animators to take the animation as far as desired and play with subtle details like ricocheting or trembling. The spaceship’s smooth animation creates an immersive and realistic scene, adding to the project’s global quality.
To create keyframe animations in Unreal’s Level Sequencers using Hierarchical Meshes from the Unreal Marketplace, such as Project Minerva, I first imported the assets into the engine and placed them in the Level Editor. Then, I created a new sequence in the Level Sequencer and added the Hierarchical Mesh asset, followed by keyframes to animate it. Next, using the Transform property tracks in the Level Sequencer, I adjusted the asset’s position, rotation, and scale at various points in time.
I also attempted to perform motion capture using online tools like Plask. However, using just one camera produced animations that looked too bumpy. Therefore, I obtained better results using keyframe animations and importing animations from sites like Mixamo.
Interactive Elements
The interactive component of my project incorporates the activation of an audio component, which is synchronised with the animation of a rocket blueprint. Additionally, the animation of the rocket blueprint triggers an animation response from the main character, who initially appears to be sleeping on camera but is awakened with a startled reaction as the rocket fires.
The interactive behaviour implemented in this project is designed to integrate with the story’s narrative. Precisely, the user activates a rocket, flying over the base camp where the main character sleeps in her room. The rocket flies at a low height and high velocity, creating a sonic boom audible from the character’s room. The loud noise of the explosion awakens the character, who reacts with a startled expression and quickly looks out of the window to check the source of the disturbance.
Implementing this interactive behaviour involved utilising a Rocket Blueprint consisting of a mesh and a Niagara particle system. The Rocket Blueprint was equipped with several event handlers to enable interactive functionality. The first event handler was activated for both custom and initialisation events. The sequencer triggered the custom event, while the initialisation event was fired when the blueprint was initialised in-game. This event activated keyboard input reception by the blueprint. The second pair of events was configured to detect when the letter ‘ç’ was pressed and was responsible for initiating the user’s reaction by playing the corresponding sound and triggering the rocket’s movement.
An additional custom event was incorporated into the blueprint to render the final trailer. This event was designed to activate the sequencer’s interactive element, enabling it to be rendered in the final trailer using the Movie Render Queue.
Principles of Animation
In the completed project, the principle of exaggeration was applied subtly to maintain the atmosphere of the trailer. An example is a character’s sudden movement, emphasising surprise and alarm through a distinct animation. This effect was achieved by blending two fast animations downloaded from Mixamo and retargeting them for use with Metahumans.
The animation principle of squash and stretch was employed toned-down to convey objects’ physical properties realistically. For instance, the landing of a spaceship on a gas planet featured the compression of its legs upon touching the ground. This effect was achieved through keyframe animations, providing precise control over the movement and deformation of the spaceship.
The principle of staging was consistently applied throughout the movie trailer using techniques like lighting, camera placement, and composition. Notable instances include the focused display of a table clock, where camera movement and colour/light contrast emphasise its importance. The staging was also evident in scenes featuring the main character and a spaceship chase, guiding the audience’s attention through keyframing and camera movement.
The principle of anticipation played a crucial role in conveying the spaceship’s weight, size, and power. Sequences before spaceship movements utilised pauses or movements in the opposite direction to build viewer expectations and create tension. This technique contributed to the believability and realism of the spaceship’s movements.
In the movie trailer, all animations, including characters, machines, and cameras, demonstrated visible ease-in and ease-out, ensuring smooth and natural movement. The use of splines in keyframed animations enabled proper acceleration and deceleration. Additionally, blending and carefully considering human animations imported from Mixamo ensured effective ease-in and ease-out for all character movements, contributing to a realistic presentation.
Metahumans
Unreal Metahumans are a powerful new technology for creating highly detailed and realistic characters in the virtual world. In this project, I have used three Unreal Metahumans as the primary characters in scenes where they are not wearing the spacesuit. However, working with metahumans comes with challenges, as many features and simplicity available with other skeletal meshes are not readily available.
To overcome this challenge, I developed retargeters that enable the seamless transfer of animations from other sources to the standard skeleton of Unreal 5. This allowed me to use regular animations from other sources. In addition, metahumans can be animated using state machines or the sequencer to manage and blend the animations of the metahumans blueprint. In the final implementation of my project, I used the sequencer for animating the metahumans.
Water simulation
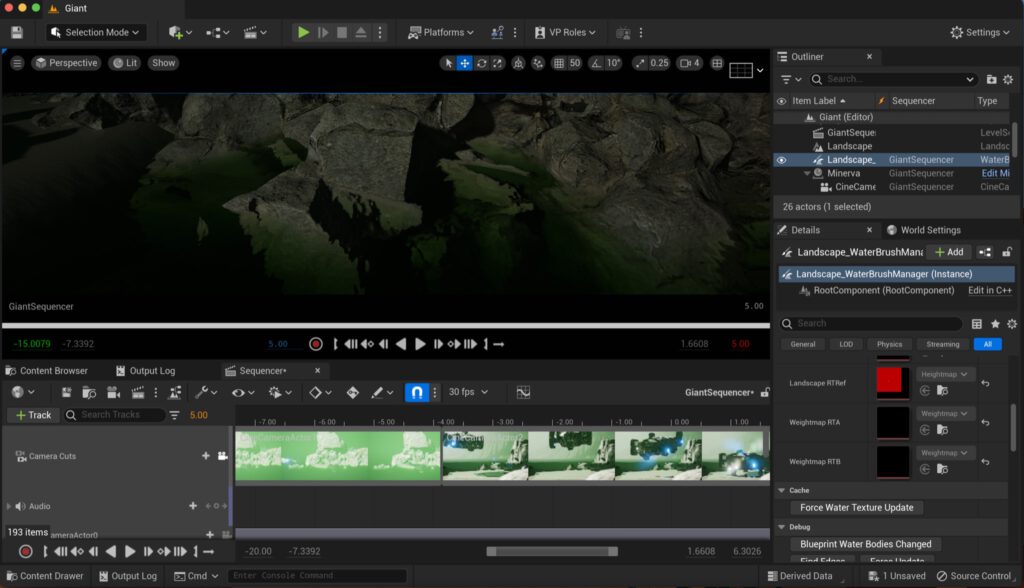
Water animation was used in the gas planet to convey a more realistic and immersive environment. To do this, I used the water simulation plugin of Unreal Engine, which allowed me to create stunning and realistic water effects. I opted to use the ocean simulator, as the planet’s surface was vast, and I required an efficient and straightforward way to simulate the water’s movement. Moreover, since an island was present on the gas planet, I did not need to consider the ocean simulator’s limitations. The water’s movement and material were modified to match the hostile environment of the gas giant planet.
Inverse Kinematics
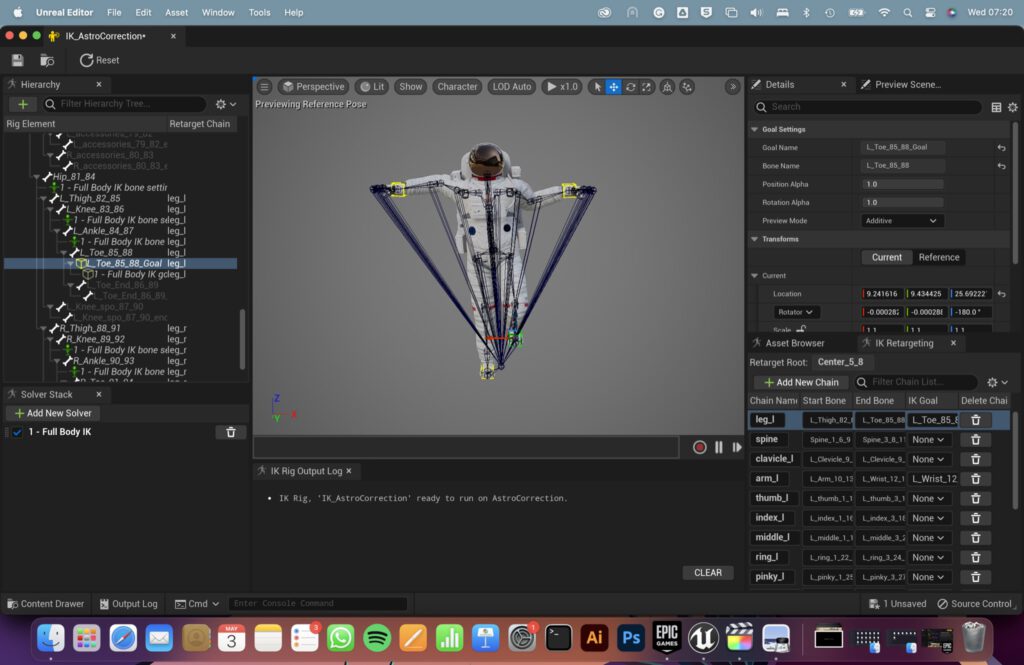
Unreal’s IK is a powerful tool that can be used for different purposes in cinematics. I decided to use IK due to challenges while implementing the animations’ retargeting. More than simple retargeting methods were required as they caused many undesired displacements and deformations. To solve this problem, I employed IK solvers within the retargeters. This allowed me to achieve appropriate retargeting of the skeletons and improved the accuracy of the characters’ movements.
I have also configured IK limits and preferred angles to ensure that the characters move in the most optimal way possible. The use of IK limits is vital to restrict the movement of the character’s limbs to realistic ranges, preventing any unnatural or exaggerated movements. Preferred angles specify the desired angles for the character’s limbs in specific poses, resulting in smoother and more natural movements.
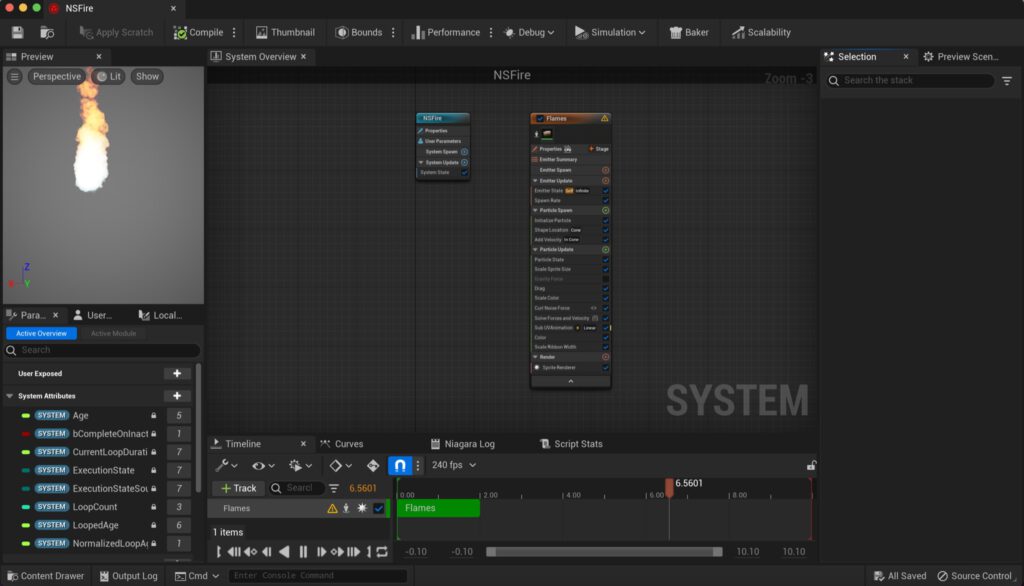
Particle system
To add more realism to the environments of my project, I have implemented particle systems to simulate fire using Unreal Engine. Particle systems allowed me to create realistic flames with customisable parameters like size, colour, and behaviour. First, I made a Niagara particle system blueprint and selected the font emitter type. Then, I adjusted the particles’ size, speed, and colour to achieve the look of a burning fire.